How can you excite a kid about coding and computers? As a software developer and father of two children, I think about this question often. A person with software skills can have big advantages in our modern world, so I’d like to equip my kids for their future.
In my home, we play video games together. My children (aged six and four) watch me play through many classics like Super Mario World and The Legend of Zelda: A Link to the Past. They like spending that time with daddy and are really engaged with the video game. When I considered how my six year old son might enjoy coding, using video games as the channel into computing was a very natural idea.
I’ve only recently explored game development myself so making a game with my son seemed like a great idea. When I asked him if he wanted to make a game, of course he said “YES!”
To Scratch or Not to Scratch
Once I confirmed his interest, it was time to figure out what to make. In the past, we tried out ScratchJr. ScratchJr uses a graphical interface and UI blocks to compose a set of actions. The tools that come with ScratchJr include looping, counting, and many of the other core things that belong in software development. My experience watching my son showed that ScratchJr was too far removed from programming.
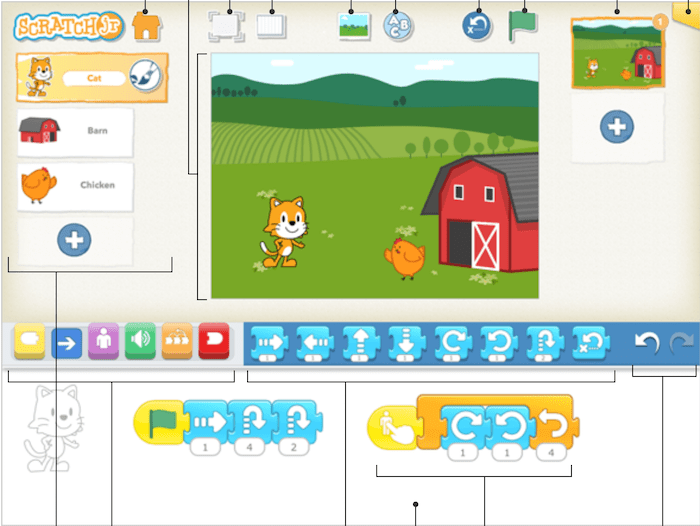
ScratchJR user interface
At first, my son would drag little characters onto the screen and make them jump up and down or move from one side to the other. Later, his play transformed into using the application as a glorified paint program. He would record clips of his voice, change the colors of the characters, and mess around with the scene in countless other ways. I love art and have absolutely no issue with him pursuing artistic interests, but ScratchJr wasn’t teaching programming skills. I don’t know if the actions were too limited, or if he didn’t see the tool as a way to make interactive things.
When I considered our game project, the ScratchJr experience made me rule out Scratch, the more advanced version of building block programming. I also listened to an excellent episode of Talk Python To Me that helped re-enforce my belief that Scratch was not the path to take. In the episode, Michael interviewed Nicolas Tollervey about Teaching Python with the BBC micro:bit.
Nicholas made an awesome point that stuck with me. As a trained musician, he noted that musical instruction teaches kids on real instruments (albeit smaller to fit the size of children). Kids develop musical skills with real instruments, and these skills are directly transferible when a kid gets a larger version of the instrument as they grow. We know this system works because it’s how kids have learned instruments for hundreds of years. His point was this: if musical instruction demonstrates how to teach a kid a complex skill like playing an instrument, why shouldn’t we bring this strategy to teaching programming?
At that moment, I became convinced that the best service I could offer my son was to teach him with a programming language with all the features he would need. Naturally, as a long time Pythonista and user group organizer, Python was my obvious choice.
A Kid Running Python
I still had a lot of aspects of this project to figure out. What is the right user interface for a kid who doesn’t know how to touch type yet? Readers of my content may know that I’m a big Vim fan, but I certainly wouldn’t subject my son to that (yet! 😉 ).
Thankfully, there was more gold in that Talk Python To Me episode. Nicholas is also largely responsible for the Mu editor.
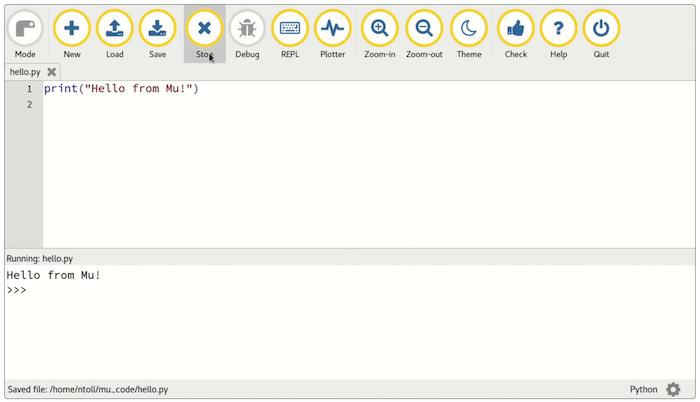
Mu user interface
Mu is an editor focused on running Python for beginners. Mu is awesome for beginners. Here are some highlights:
- Python is included so there is no need to install something extra! This point probably cannot be overstated, because Python has a reputation for being complicated to install.
- A number of popular packages like
requests,matplotlib, andpyserialcome preinstalled to lower the barrier further. - There is a mode to work directly with Adafruit’s CircuitPython to use hardware and microcontrollers in Python.
- Game development is possible with the preinstalled Pygame Zero.
That final highlight is the clear reason why I chose to use Mu for my son.
Pygame Zero Versus Pygame
Pygame Zero is a tool for making video games. It is separate, but related to Pygame, a long-lived Python project that let’s you build (mostly 2-D) games using Python.
The differences between Pygame Zero and Pygame are related to the target audience. I think the Pygame Zero documentation states their project goal well:
[Pygame Zero] is intended for use in education, so that teachers can teach basic programming without needing to explain the Pygame API or write an event loop.
I mentioned at the start of this article that I was learning how to write games too. In my personal exploration of game development, Pygame was my primary choice for writing games. (Truthfully, I started with LÖVE to experiment with Lua and made a Pong clone, but I concluded Lua wasn’t for me.)
The short version of my experience with Pygame is that it’s not very beginner friendly. I’ve learned quite a bit about game development since I started a couple of years ago. When I view Pygame today, it seems more like a game library than a game engine. All the pieces are in place to make a game, but you have to wire everything together yourself. Long time game developers may love this flexibility, but it’s fairly overwhelming to new developers. And it would border on impossible for a six year old kid.
When I tried out Pygame Zero, I was surprised how different the experience was. Pygame Zero is much more like a game engine. The common pieces that you must handle yourself in Pygame are pre-wired in Pygame Zero. This dramatically lowers the barrier to entry, at the cost of flexibility. It’s absolutely the right trade-off for teaching.
What Did We Make?
After all that research, we made our first game in Pygame Zero. Let’s look at my son’s code, then explore the things he learned as well as the things I learned in the process.
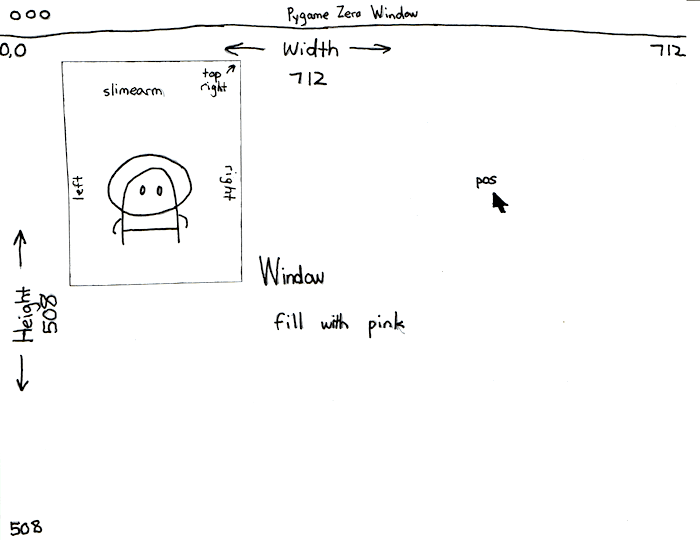
First, here’s his entire first game.
slimearm = Actor('alien')
slimearm.topright = 0, 10

WIDTH = 712
HEIGHT = 508

def draw():
    screen.fill((240, 6, 253))
    slimearm.draw()

def update():
    slimearm.left += 2
    if slimearm.left > WIDTH:
        slimearm.right = 0

def on_mouse_down(pos):
    if slimearm.collidepoint(pos):
        set_alien_hurt()
    else:
        print("you missed me!")

def set_alien_hurt():
    print("Eek!")
    sounds.eep.play()
    slimearm.image = 'alien_hurt'
    clock.schedule_unique(set_alien_normal, 1.0)

def set_alien_normal():
    slimearm.image = 'alien'
And here’s a screenshot from the game running:

First game!
His entire game fits into 29 lines of code, including blank lines. In this 29 lines of code, he was able to learn an enormous amount of stuff. Also, to give credit where it is due, the game is a modified version of the one listed in the Pygame Zero introduction. If your eyes are hurting, you can thank my son for the hot pink color choice. The documentation used black, which might be a better fit for outer space.
What Did He Learn?
If you’ve been writing code for a long time, it’s super easy to forget the things that are hard or weird in programming.
Seeing a new programmer wrestle with core concepts is a great reminder that programming is hard, and we must be vigilant in our empathy to those who haven’t walked the path we walked.
Naming Things
In the very first line of the game, my son had to deal with variables.
slimearm = Actor('alien')
Variables (especially for someone who hasn’t done Algebra)
are a pretty weird concept.
I explained how variables are names for something else
and how the name could be whatever we wanted.
Because our program took many weekends to complete,
we revisited the variables concept each time.
Ultimately,
I found that the best way to show
how little the names mattered
was to suggest we change the name alien
in the documentation
to something else.
Thus, slimearm, his choice, was born.
Using a different variable name helped give him ownership
of the code he wrote.
We had conversations about how he would have to use his slimearm name
instead of what he was seeing
from the documentation page.
Mutability
My son also learned how malleable software can be. Pygame Zero made this extremely easy to show.
WIDTH = 712
HEIGHT = 508
Setting the window size for the game
requires nothing more than changing WIDTH and HEIGHT.
My son would:
- Fiddle with the numbers.
- Start the game to see the result, then stop it again.
- Pick some crazy values.
- Start the game to see a wacky window size.
- Repeat until he was happy.
Now that I think about it, kids would make for amazing Quality Assurance engineers given their pension to explore and try things out.
Functions and Side Effects
I think what makes video games so magical as programs for teaching is the effects they produce.
Our industry has an odd obsession with thinking about side effects. Entire modes of programming try extremely hard to minimize side effects. What’s odd to me is that side effects like I/O or drawing to a screen are often the parts that we actually care about and want to see!
Games are really neat because they embrace side effects fully. Since the side effects show us that our code is doing things, they bring a lot of satisfaction.
When I got to the draw function,
my son got what he came to see:
the computer doing something that he wrote!
These were the side effects in action.
def draw():
    screen.fill((240, 6, 253))
    slimearm.draw()
This draw function has no return statement.
Each time you call it, the results will be different
because of the state of slimearm.
In other words,
it fails to be a “purely functional” function
since it has side effects.
Maybe this makes higher education academics cringe,
but it’s great for kids.
When we first started draw,
we dealt with screen.fill as the first side effect.
In my home,
we’ve played with Arduino circuits regularly
so my children know what LEDs are,
and my son understands that an LED has red, green, and blue lights in it.
I didn’t bother explaining tuples,
but I told him that the three numbers
to fill were RGB.
We fired up Chrome DevTools,
launched a color picker,
and he dragged around until we found the “perfect” color.
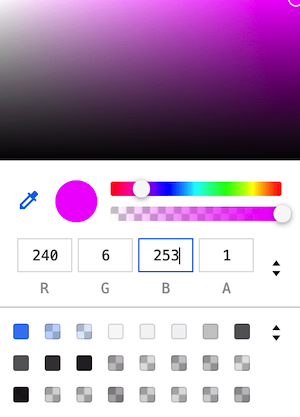
Hoooooot pink!
State and Time
Before we could see the effects of slimearm.draw
in the draw function,
we needed to update the state of the alien
to advance its position.
def update():
    slimearm.left += 2
    if slimearm.left > WIDTH:
        slimearm.right = 0
When I reached this stage,
I had to find a method to explain
how Pygame Zero alternates
between draw and update
to make the game run.
It’s an example of the Update Method Pattern. 1
I used the idea of a filmstrip to illustrate the concept. In hindsight, this probably wasn’t the best metaphor since my son was born in 2012. We are well into the digital age for most video production so film is a rarity.
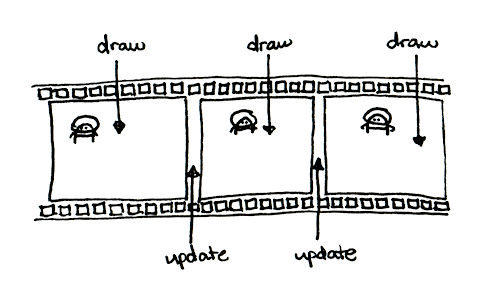
The game loop as a filmstrip
After I explained how film worked,
my son latched onto the idea of frames
as individual images that are drawn
on the screen.
We talked about how update is in between the frames
and causing the frames to be different
from each other.
He seemed to understand the idea,
but then we had to explore coordinates
and (x, y) pairs
and more concepts
from Algebra
that he has not studied yet!
So, I went back to the drawing board, literally. The best way I could think to explain how things worked in a 2D coordinate space was with a paper prototype.
Our paper prototype
Our paper prototype was an extremely useful visual tool.
With the prototype,
I made a game window
and our alien character
which I labeled as slimearm
to match the variable name.
Using the two separate pieces of paper,
my son could see,
in a very visual way,
how the character would move.
By anchoring on the filmstrip concept,
we iterated through the game loop each frame.
Since he could point to the various parts,
like the left edge which advanced
in the update method,
he was able to understand
how the computer changed the position
of the alien.
The labels also helped him get a grasp on the conditional logic. By asking in each loop “Is slimearm’s left edge farther over than the window width?,” it became clear when the alien should be positioned back on the left side and with what edge of the sprite.
Interacting with the Game
Games aren’t really games until you can do something in them. The point of this game is to try and click the alien. If you click it, you’ll hear a little sound, and see the alien temporarily change into a hurt image.
def on_mouse_down(pos):
    if slimearm.collidepoint(pos):
        set_alien_hurt()
    else:
        print("you missed me!")
We started with the concept
of events.
Being a digital native,
my son had no trouble
with thinking about actions
like touching a screen.
It took a bit of explanation
to understand a “mouse down” event,
but we used the trusty print function
to illustrate the idea quickly.
Mu’s game mode has a built-in console that you can see in the editor while the game is running. Our first version of the function above looked more like this:
def on_mouse_down(pos):
    print('You clicked!')
Even this simple level of interaction was enough to make my son light up. I’d try to talk to him about something, but he would start up the game and click around to see an endless stream of “You clicked!” messages show up in the console. It turns out that low tech feedback is enough to get kids really excited!
When we moved up to the full function, I had to explain collisions. Thankfully, the paper prototype made this easy because we could make a game out of the game. I told my son to pretend to play the game while I was the computer. I’d slide the alien cutout along and yell out “Eek!” or “You missed me!” as he would try to tap on it. Not only did this make us both smile, but the idea of colliding was really natural because of the real world analogue.
def set_alien_hurt():
    print("Eek!")
    sounds.eep.play()
    slimearm.image = 'alien_hurt'
    clock.schedule_unique(set_alien_normal, 1.0)
When we got to the set_alien_hurt function,
we were really dealing
with the juice
of the game
by adding sound effects and changing sprite images.
The trickiest part of this was to explain computer clocks
and the purpose of the line:
clock.schedule_unique(set_alien_normal, 1.0)
I’m still not sure if he latched onto this concept or not.
Frankly,
we had nearly everything working
so his interest in adding more code waned rapidly.
schedule_unique is a challenging bit of code.
You need to understand that functions are things
that can be passed around like variables.
You also need to wrestle with the idea
that set_alien_normal will be called some time
in the future
and not by code that you wrote.
I didn’t belabor this point
in the code
because we definitely reached the limits
of his curiosity.
That brings us to the end of his game code. My son covered:
- Naming
- Mutability
- Functions and side effects
- State and time, and
- Interaction
That’s a pretty amazing list of topics for almost any programmer!
What Did I Learn?
Let’s close this out with some of my personal lessons as a teacher. Some of the lessons were reminders of things I knew, but some of these were new lessons. I’m a parent of a kid who is just starting to come into his own and take ownership of his learning, so I’m learning how to help him best.
Repetition, Repetition, Repetition
And one more time: repetition. For most of us, our brains don’t lock-on to concepts after the first exposure. We need to experience things repeatedly for the concepts to sink in. I saw this as my son grappled with variables. Each week as he recalled variables, I had to remind him of what they were for.
If I wasn’t prepared for this kind of behavior, it would be effortless to get irritated. Since I’ve dealt with variables for years, I am so far removed from that first exposure that I barely recall what it was like. Exercising patience was my solution when it felt like he wasn’t mastering concepts.
Feedback Is Critical
I observed that my son was most interested when the computer would do something based on his input. Whether it was showing colors, displaying text, making sounds, or whatever else, he would delight in those moments of feedback. This is what brought me satisfaction as well. Seeing the joy on your child’s face as they latch onto an idea is one of those rewards of being a parent. 2
Use Props
Kids learn in multiple ways. When I hit a wall explaining some ideas with words, switching to a paper prototype dramatically improved the education experience for both of us. Not only was it a quick craft we could do together, but it was a fabulous aide in this process.
Recognize the Limits
Do I think my son would be able to make a game on his own now? Certainly not. I had to remember that there are limits to how much he would retain as we made this game. I didn’t expect him to become an amazing programmer after we finished. This meant that when we ran into some of the harder concepts, I would push a little to make him stretch his thinking, but back off when it was clear he wasn’t ready for an idea yet.
Celebrate!
Anyone who knows me well will know that I can be fairly stoic. This was not the time to be stoic. Making a game comes with a certain amount of intrinsic reward, but I also wanted my son to see a very clear extrinsic reward. Learning to program is difficult and making something that works (even if it comes from a documentation tutorial) is a feat worth celebrating for sure.
How many kids manage to make their own functioning video game? I’m sure that number is small in the scheme of things. So, I tried my best to get out of my normally stoic shell and celebrate with my son. In doing that, he could appreciate what he accomplished with someone who understood the project and cares for him.
Now What?
It didn’t take long before he started to have ideas of his own about the next game that we can make together. That game is still in the planning and ideation phases, but he’s excited to work on one.
That’s exactly the outcome I was hoping for. My son now sees programming as a tool for making things. And, I think the world could use more makers.
If you’ve enjoyed this article, would you mind sharing it on X or your favorite social media so that others have the chance to learn something too? Thanks for reading!
Game Programming Patterns is a fabulous book. It is available to read for free online, and I loved it so much that I bought it on Amazon to support the author, Bob Nystrom. ↩︎
Being a parent is certainly not all sunshine and roses. I have plenty of respect for people who have no desire to be parents. Also, I’m sure it’s possible to experience this same kind of satisfaction for kids who are not your children. I’d guess that this satisfaction is a big motivator for teachers. ↩︎