
How do you find the right file to work on quickly?
If you’ve worked with an Integrated Development Environment (IDE) in the past, you may be used to using a file tree to explore the files in your project. This can be great if the project is new as you’re learning what files are available to edit.
What if you’ve worked on the project for a long time and know where nearly everything is? In that scenario, you’d want to open a file as fast as possible so you can start working.
In this article, we’re going to look at an alternate way to navigate files instead of using a file tree.
This is the third article in a series about Vim. You can check out the other articles too.
- Using plugins
- Instant testing
- Navigate files instantly
- Blazing fast search and global replace
Opening files
Opening files seems like a basic subject. You use a file explorer, navigate to a directory, and double click the file you want. End of story, right?
Maybe that’s the end of the story for someone who doesn’t write code. Developers have needs that other average users do not have. When you work on a software project, you’ve got a collection of files that interrelate with each other. Additionally, the location of these files can be very important. Put a source code file in the wrong location and a compiler may not even know it is there. These kinds of constraints mean that developers must adhere to a certain structure whether we like it or not.
With constraints imposed upon us by the programming language or platform that we use, we have to learn how to navigate directories that can reach astounding complexity.
Using file trees
The standard way that many editors help with this complex problem of managing project structure is with a file tree.
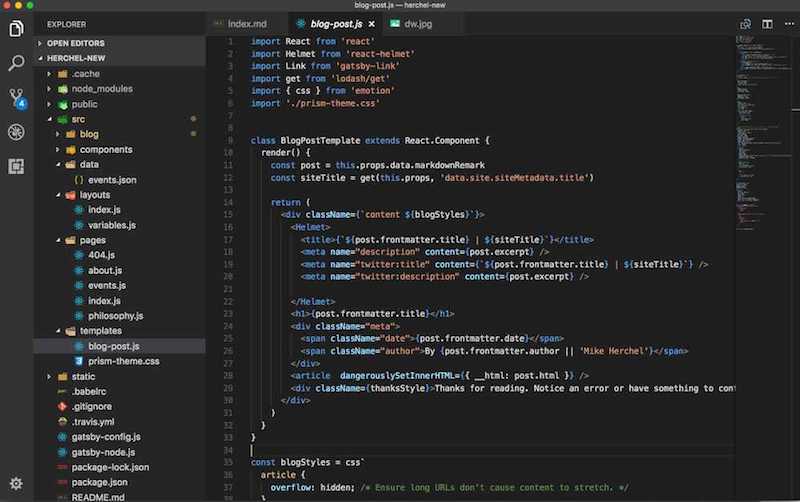
Example file tree from VS Code
File trees are a great way to explore a project structure. A file tree is very visual and those visual cues provide a location for our memory to latch onto.
For very small to medium sized projects, the file tree will do an excellent job. These sized projects won’t take many mouse clicks to navigate to the right file and, if you navigate a file tree with a keyboard, you can cursor your way through the tree at a reasonable speed.
The file tree approach begins to break down with larger projects. This will be very noticeable if you work in a professional context on a team with a lot of files in your company’s main code respository. For instance, my current job has about 60 directories in the primary code package. That seems like a lot, but each directory serves a specific purpose and preserves Separation of Concerns. The downside is that it’s a lot of code to navigate in a file tree.
On the surface, a large project seems to be even worse when you consider an editor like Vim. How does an editor with no built-in file tree deal with something large?
First, let’s think about how not to do this.
Pathological Vim file navigation
Before I start, I’ll preface this section by stating that this is how I used to use Vim. I’m not judging anyone who does Vim this way currently. Hopefully, I’ll show a better way that I was taught by someone else and change your life for the better too!
My method of exploring different files in Vim looked like this:
- Navigate to the directory containing some code.
vim some_file.pyand edit the file.:wqwhen I was done with my changes.cd ../another_package/to go somewhere else.vim a_different_file.pyand repeat the process over.
What’s not good with this approach?
IT’S SLOW! The sequence of steps I listed above is the best case scenario. That scenario would only happen if I remembered everything exactly, knowing the names of all the files I needed and the location within the project structure.
We can break down the specific problems in this navigation style.
- We have to change directories a lot. Like, A LOT.
This also implies running the
lscommand over and over to see what files and directories are available. And we’ll needpwdfor all of those times where we forget where we are. - We open and close Vim regularly. Each time Vim is opened, it may be in a different working directory. This could cause plugins to behave differently and in ways that we don’t expect. Also, we lose the benefits of caching that Vim does that can make it more useful as it’s open longer (e.g., remembering buffers or lettings plugins cache function names from our app for easier navigation).
- Working with multiple files is an absolute pain. To work around this, we could run multiple terminal tabs and put an open file in each tab. For instance, I used to have a tab for my code file (or one for each code file), a tab for my test file, and a third tab to invoke my test runner.
This mode of navigating is definitely inferior to an editor with a file tree explorer.
Let’s do some Vim supercharging.
CtrlP: The best plugin in your Vim configuration
The plugin that we will focus on is CtrlP. In contrast to a file tree, CtrlP is a fuzzy file finder.
As the name implies, the plugin will try to find files for you so that you can work on them. The fuzzy part of the name describes how the plugin finds files. Fuzzy refers to the method of searching for files.
A fuzzy search means that you don’t have to type the exact name of the file you want to open. Think about a Django project with a file structure like what’s shown:
$ tree .
.
├── apples
│   ├── __init__.py
│   ├── admin.py
│   ├── apps.py
│   ├── handlers.py
│   ├── models.py
│   ├── tests
│   │   ├── __init__.py
│   │   ├── test_models.py
│   │   └── test_views.py
│   ├── urls.py
│   └── views.py
└── oranges
    ├── __init__.py
    ├── admin.py
    ├── apps.py
    ├── models.py
    ├── tests
    │   ├── __init__.py
    │   ├── test_models.py
    │   └── test_views.py
    ├── urls.py
    └── views.py
Each Django app has its own views.py file
that can display content
to a visitor on the website.
With CtrlP,
the process to open oranges/views.py would look like:
- Start CtrlP with a keyboard shortcut (which is bound to… you guessed it… Ctrl+P by default).
- Type a few of the characters in the path name.
There is no need to be very precise here.
For this small example, if you typed
orvfor theorinorangesand thevinviews.py, then CtrlP would probably have filtered to the file you want. - Hit enter to open the file.
Not sold on that text description? Check out this video to see CtrlP in action.
For projects that you work on frequently, you’ll find this is a blazingly fast way to get around the files that you know. Even if you only remember an inkling of the filename that you want to work on, CtrlP can get you to your file.
This method of navigating files in your project is transformative. I’m not sure I can state that more emphatically, but let’s try!
Using a fuzzy file finder like CtrlP in your text editor will FOREVER alter the way you interact with code editing.
As someone who experienced this kind of transformation, I make that previous statement from a true belief that it will make you a much faster developer.
Is this some kind of Vim dark magic wizardry? Maybe, but probably not. To demystify what is going on, we can turn our focus to how you can start with CtrlP.
Up and running with CtrlP
The first thing to do is install the plugin. The CtrlP documentation refers to Vim’s new bundle system to do the installation, but, frankly, I don’t really care for that system. I think the plugin managers offer a better experience.
If you’re using vim-plug as I recommend in my first Supercharging Vim post, then adding CtrlP looks like:
call plug#begin('~/.vim/plugged')
" Other plugins here.
Plug 'ctrlpvim/ctrlp.vim'
call plug#end()
Then you can install the plugin with :PlugInstall.
CtrlP will find files using Vim’s built in file searching features, but you can also control this to make file finding even faster!
One of a developer’s most used tools is a search tool
like the venerable grep program.
In recent years,
modern alternatives appeared
that are even faster than grep
(and that’s saying a lot because grep is fast).
For years,
I used The Silver Searcher
which provides one
of those faster search tools
with a command named ag
(after the periodic table entry for silver).
While ag is awesome,
I found an even faster search tool
called ripgrep
with a command named rg.
Both tools are blazingly fast,
but I chose rg because it has an edge over ag
as seen in the author’s very thoughtful
performance benchmarks.
If you want an example of how to do benchmarks well,
you should give that post a read
because the author is definitely more interested
in the data
than a marketing pitch
for his tool.
Getting back to CtrlP,
we can make CtrlP use rg
as its file finding engine.
Don’t forget to install ripgrep!
You can do this with brew install ripgrep
if you’re on macOS
or check out the ripgrep installation options
to see how to get it for your platform.
To make CtrlP use a different file finder,
we need to set g:ctrlp_user_command.
In my vimrc file,
I have this little snippet:
if executable('rg')
  let g:ctrlp_user_command = 'rg %s --files --hidden --color=never --glob ""'
endif
The %s is the string format placeholder that is passed
on to rg to aid in filtering.
That’s all the configuration that’s needed to get an incredibly fast fuzzy file finder.
Using CtrlP
The core flow for using CtrlP consists of:
- Starting CtrlP with the
Ctrl+pkeyboard shortcut. - Typing until you find the file you want.
- Opening that file in your current buffer, a new split, or a new tab.
To open the file in your current buffer,
hit Enter once CtrlP is highlighting that file.
My preferred mode of working with files is with splits. Splits allow me to get a side-by-side view quickly. I like to have my test file next to the file I’m testing. There are two kinds of splits:
- A horizontal split (see
:h splitin Vim’s documentation). When CtrlP is up, you can start a new horizontal split withCtrl+x. - A vertical split (see
:h vsplitin Vim’s documentation). With CtrlP up, a vertical split starts whenCtrl+voccurs.
Thoughtbot has excellent advice for navigating splits seamlessly in this post in case splits are tripping you up. My sense is that splits are the fastest way to move between a set of already open files while simultaneously letting you see the context of those files.
If tabs are more of your speed
in Vim,
you can open files
in CtrlP
and put the new file
in a tab
with Ctrl+t.
Aside from different modes
of looking at files,
you can adjust which files to consider.
You can use :CtrlPBuffer
to search through your opened buffers
which makes searching even faster.
This can take a project
with hundreds or thousands of files
and reduce the search
to the dozen or so files you’re actually working on.
I map :CtrlPBuffer to a leader command
to make that command very accessible
since I used it so often.
nnoremap <Leader>b :CtrlPBuffer<CR>
Whatever method you choose, getting a view of the file you want to see is usually no more than a few keystrokes.
I hope you have a good sense
of what a fuzzy file finder can do
to speed up your file navigation
while coding.
Other editors include fuzzy file finders too
so I’d recommend you search
and see if your favorite editor supports it.
I know VS Code has a fuzzy file finder
and, guess what the shortcut is, Ctrl+p (or Cmd+p on macOS)!
I can only wonder why. 😉
If you liked this article and learned something along the way, would you do me a favor and share it on X or your favorite social media so that other have the chance to learn something too? Thanks for reading!